Air Hockey Table
Solo Project
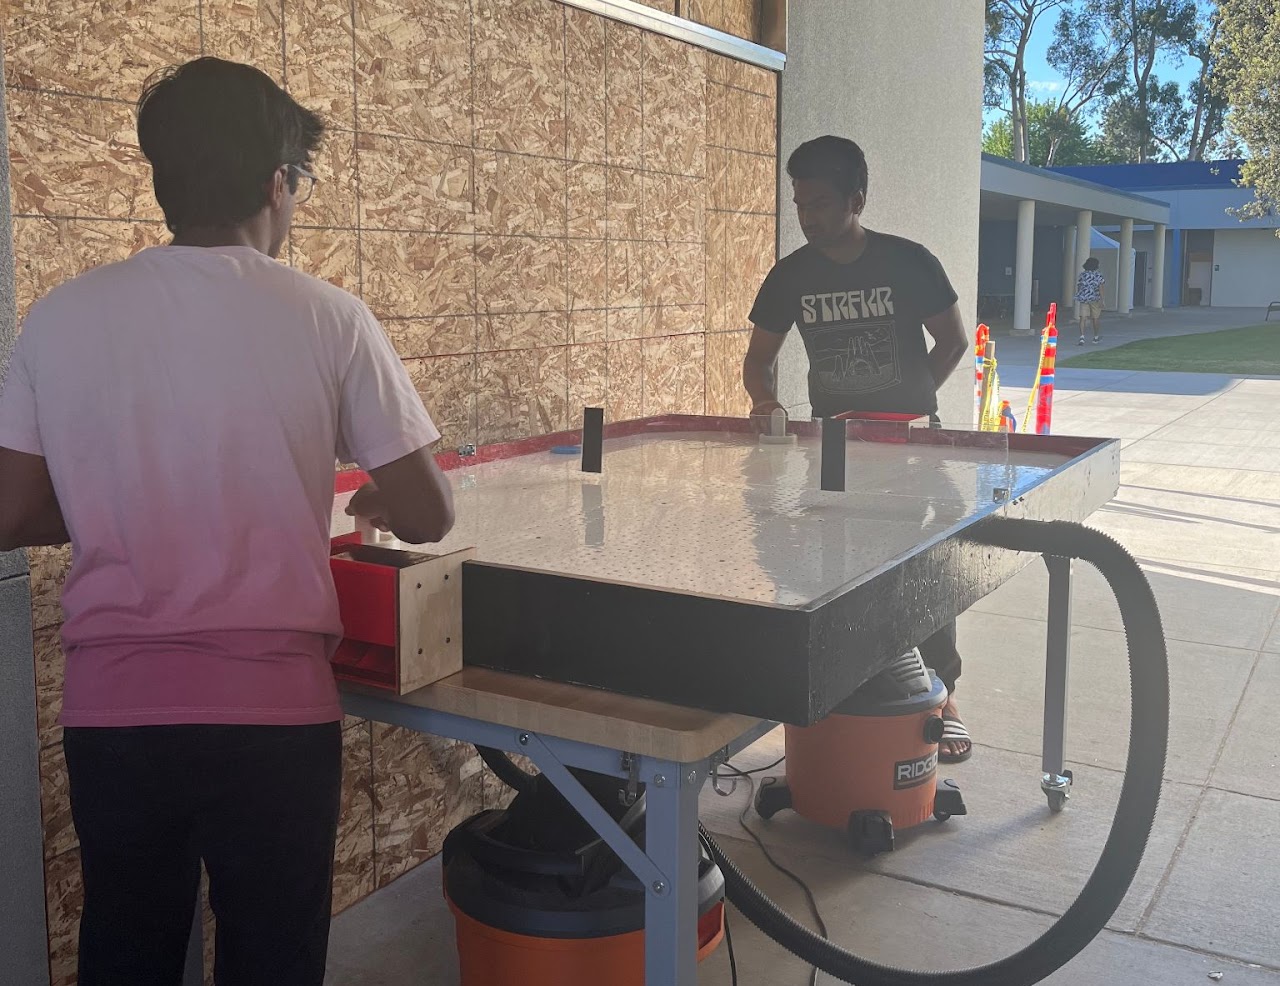
My first real build, done at my school's shop using almost entirely salvaged materials including an old whiteboard for the playing surface and existing shop vacs for airflow. The main design problem was getting uniform pressure across the full 5 by 8 foot plenum; one shop vac couldn't overcome the pressure drop across an 8 foot span, so I added a second on the opposite end to balance the distribution. Drilling roughly 5,800 1/16 inch holes by hand took about a week. Looking back, the biggest lesson was how much easier downstream work gets when the raw materials start flat and square.
Background
This was my first real engineering project. I originally wanted to build a pool table, but sourcing a slate playing surface turned out to be prohibitively expensive. An air hockey table solved the cost problem; the materials are cheap, but the build requires a lot of time and patience. I built the table at my school's shop using almost entirely salvaged materials: an old whiteboard headed for the trash, leftover wood from the shop, and existing shop vacs. If everything had been purchased new, I estimate the total would have been around $150 to $200.
Playing Surface
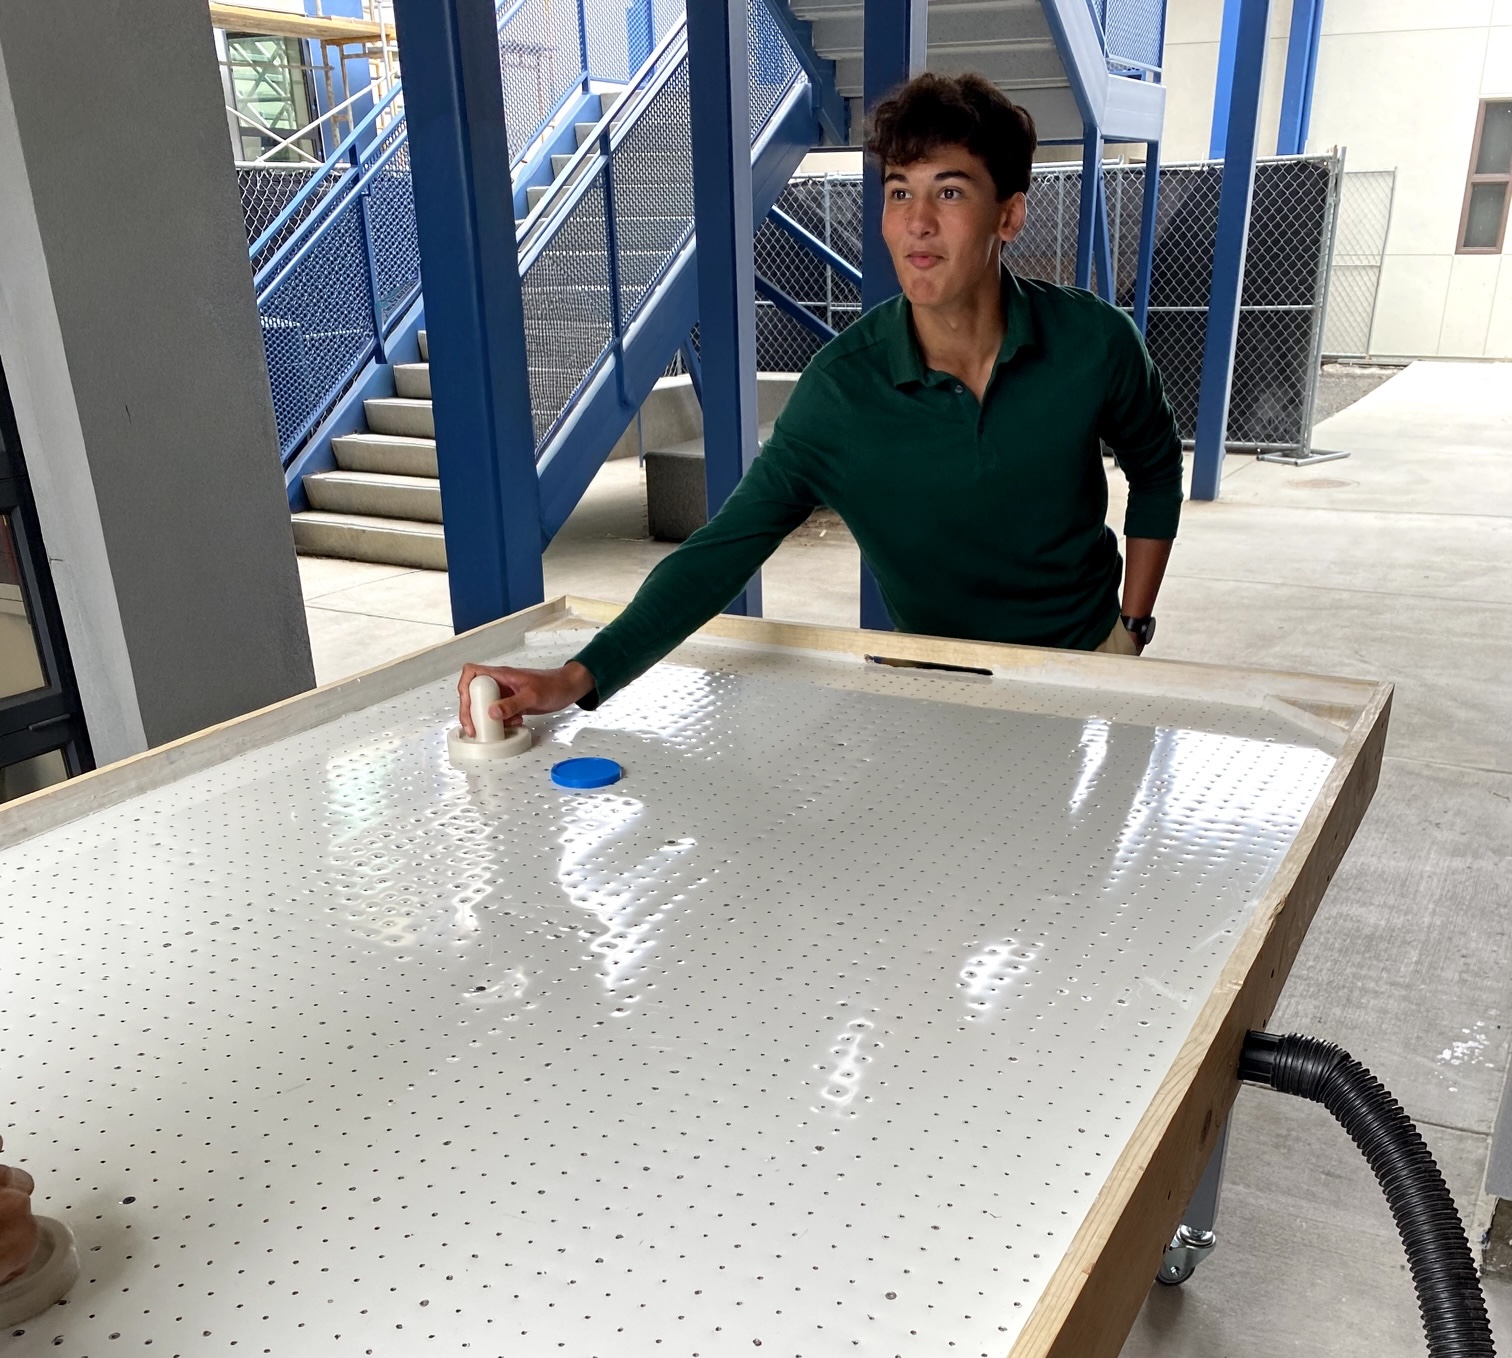
For the playing surface, I used the salvaged whiteboard. Making a smooth, low-friction, and cheap surface is nontrivial, and whiteboards are a readily available alternative. The table is full size, approximately 5 by 8 feet, which made the main challenge drilling enough holes for consistent airflow without weakening the board. My final pattern uses 1/16-inch holes on a 1-inch grid, ensuring the puck always has multiple sources of airflow beneath it regardless of position.
Drilling roughly 5,800 holes by hand took about a week. I drew a grid directly on the whiteboard surface as a jig and drilled holes at each intersection. I recruited friends whenever anyone was around to help, handing out drills and working through the grid together. We ran into tearout issues along the way; the back of the whiteboard is particle board, which chips easily when a drill bit exits. I learned to back the holes with scrap wood to reduce tearout, though the first few hundred holes were rougher than the rest.
Air Chamber
A 4-inch tall sealed chamber beneath the whiteboard acts as a plenum. I started with a single shop vac on one end, but the airflow was noticeably uneven; the puck floated well near the inlet but dragged on the far side. The chamber wasn't pressurizing uniformly because one inlet couldn't overcome the pressure drop across an 8-foot span. Adding a second shop vac on the opposite end balanced the pressure distribution and solved the problem. Each shop vac pushes roughly 100 CFM; with ~5,800 holes at 1/16-inch diameter (total open area of about 18 square inches), the chamber pressurizes enough for air to exit uniformly across the full surface. I sealed the edges with caulk and paint to prevent leaks.
Frame Construction
The frame is wood, assembled with screws. This being my first build, I didn't know about good joinery practices, so everything was drilled directly into endgrain. Some of the wood was warped, and rather than planing it flat I just screwed it down at multiple points and forced it straight, which worked but isn't something I'd repeat. Rails around the playing surface serve as bumpers, lined with felt to deaden puck impacts and keep rebounds predictable.
Puck, Strikers, and Goal
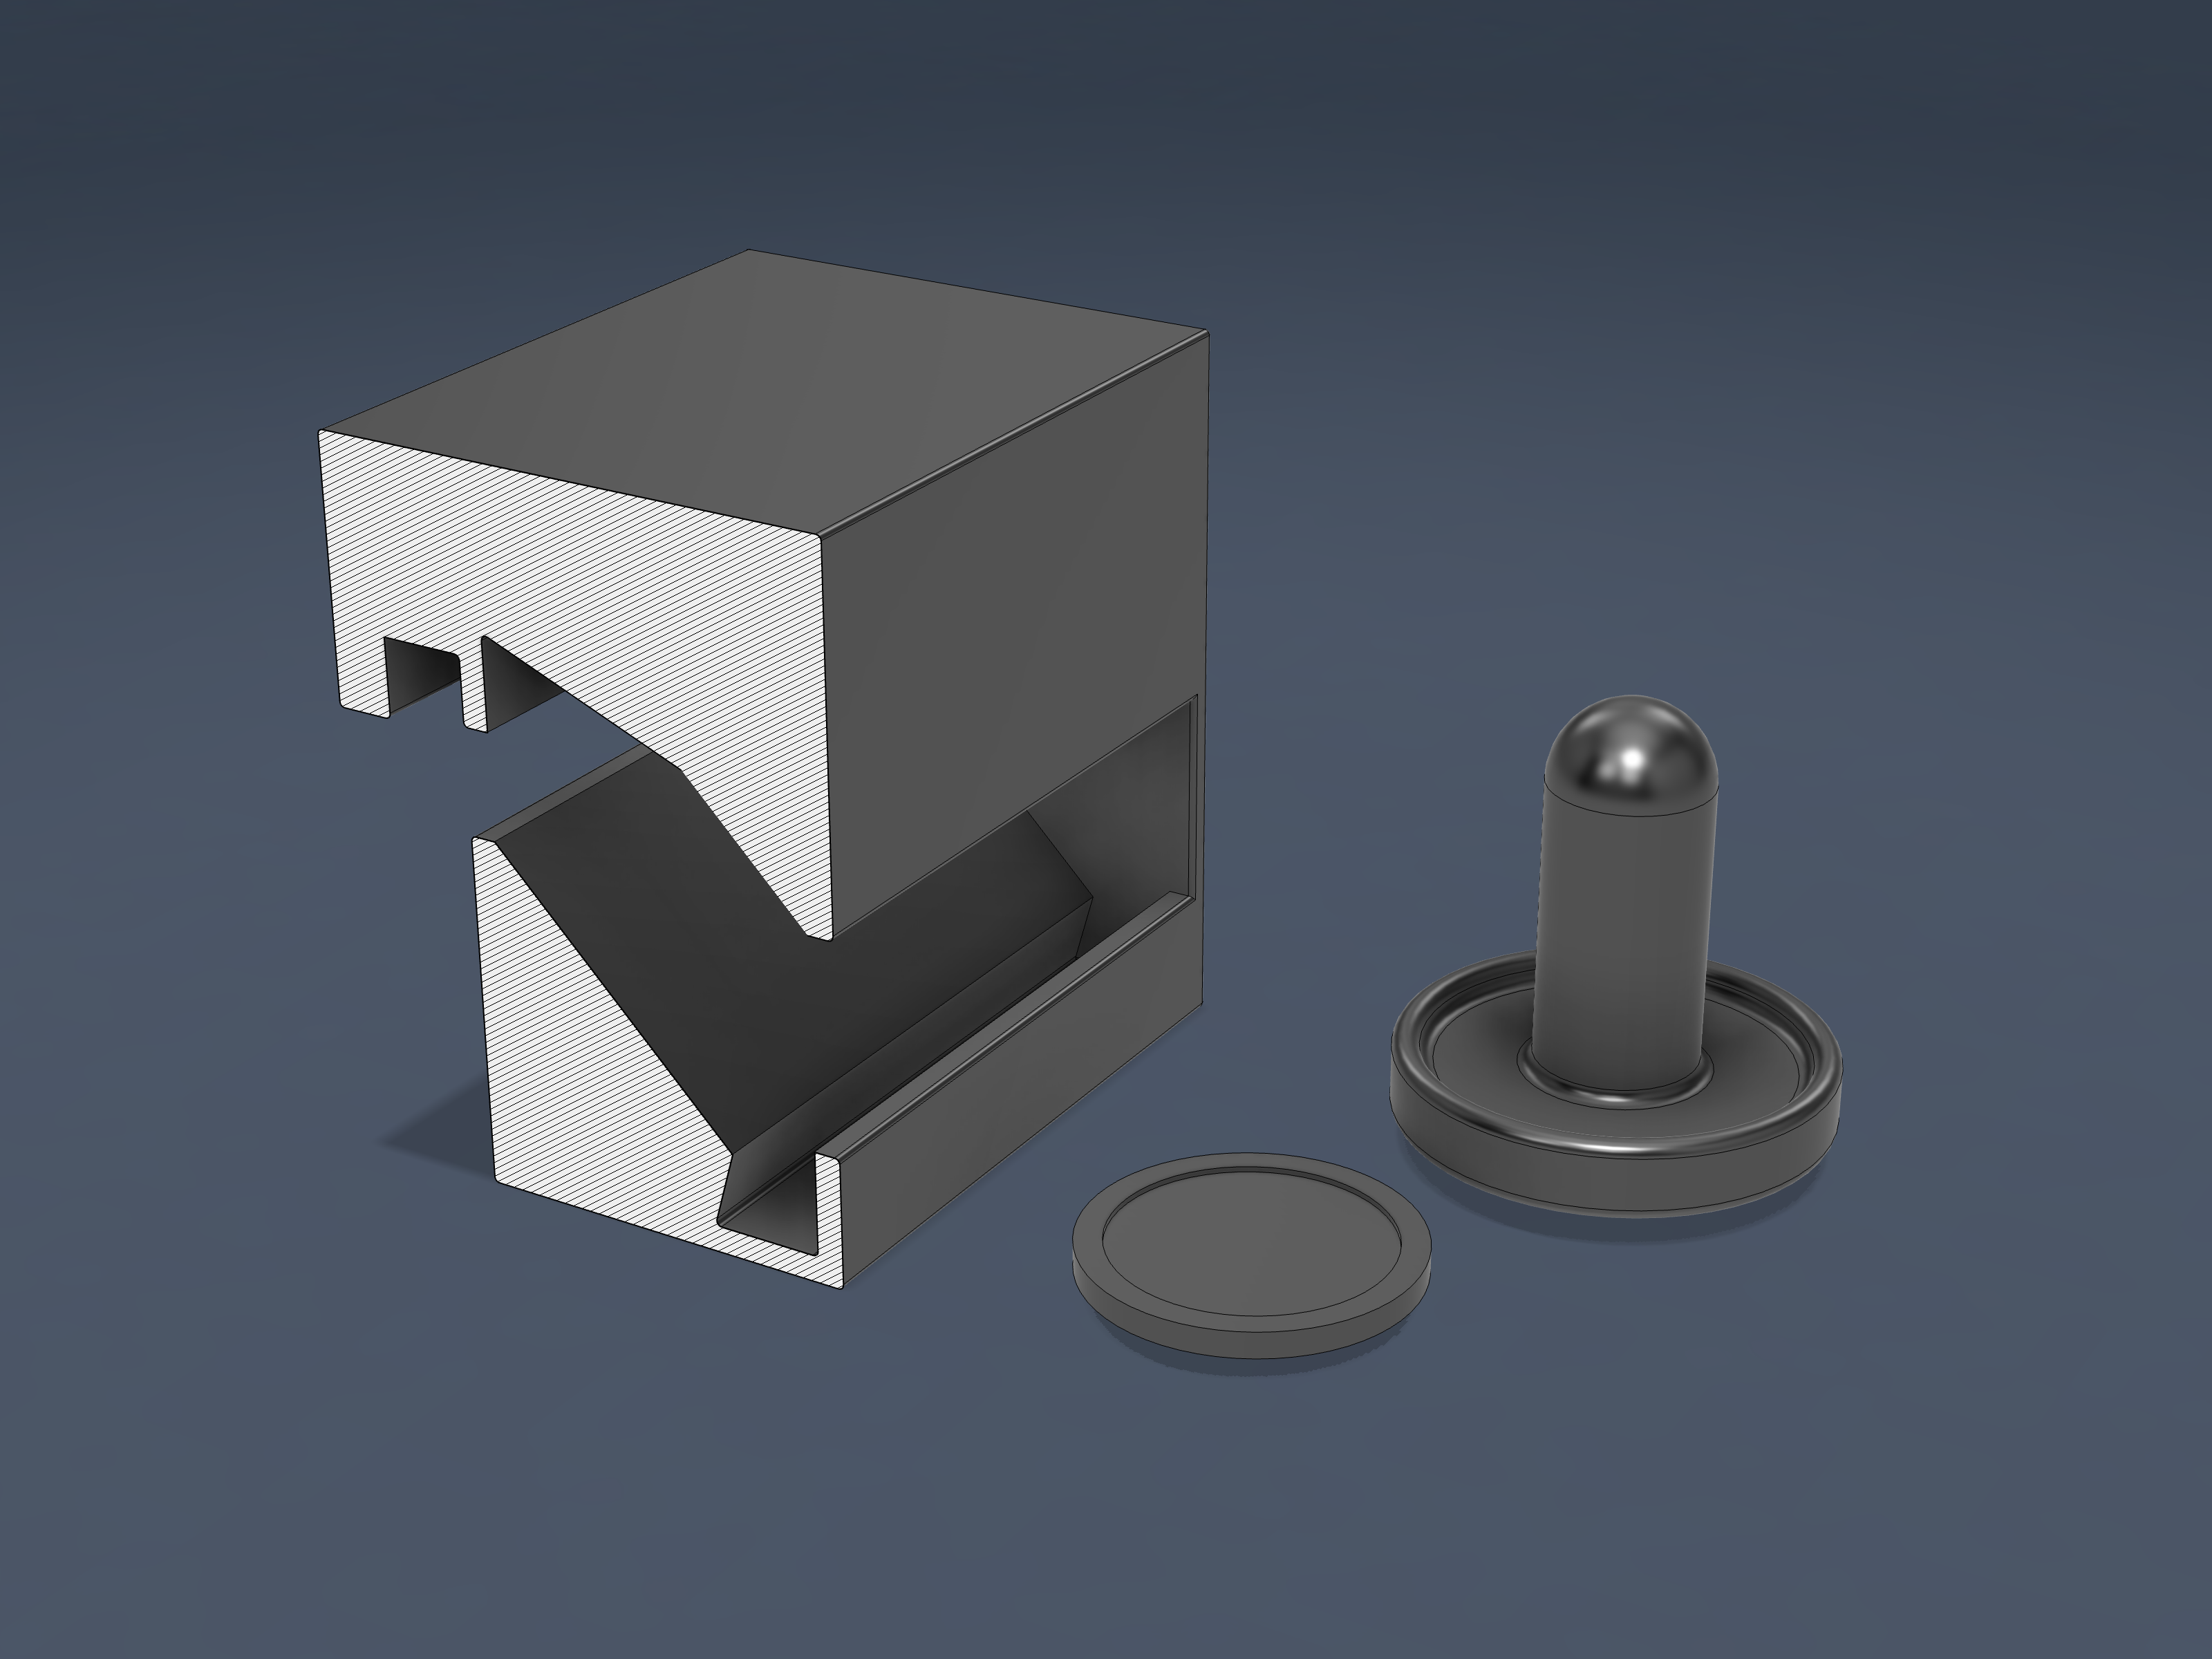
I designed and 3D printed the puck and strikers to match standard air hockey dimensions. The puck floats well on the air cushion, and I shaped the striker grip to match the contour of a hand for better ergonomics. I also designed the goal and laser cut it; I wanted a pool table style return where the puck drops into the goal, flips vertical as it rides down a ramp, and lands upright in a tray at the end of the table for easy retrieval. Getting the ramp angle right was the most finicky part of the build; too steep and the puck would jam, too shallow and it would shoot out the back and hit whoever was standing there.
The table won best project at a district-wide engineering showcase and is still regularly used.
Reflection
This project taught me more about building things than anything else up to that point. The biggest lesson was how much easier everything downstream gets when the raw materials start flat and square. Warped boards forced into position with screws and endgrain joints both compounded into problems during integration that would have been avoidable with better prep. A single higher CFM blower with a diffuser plate would also be worth trying instead of two shop vacs, since it would simplify the setup and cut the noise.